How to add a check
Learn how to get started with Pingdom and set up your very first uptime check.
Product
Uptime monitoring
Tags
Check
Get started
Uptime
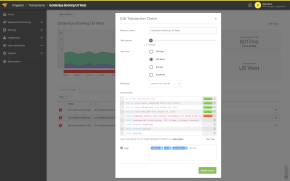
There are many kinds of checks you can set up. Let’s start with the Uptime Check. Click the Add Uptime Check button. You’ll find it in the top right corner of the dashboard.
What do you want to call your check? Name it so you’ll always recognize it.
Here you can modify the test interval if you'd like. The default is once per minute, which we recommend since this will catch even small outages.
You can monitor your web page, e-mail and network. Simply click on the tabs.
Here’s where you add your URL. Make sure that you switch to HTTPS if your site uses secure protocol.
Do you want the ability to choose location from which the tests are performed? Then the Professional or Enterprise account is the right choice for you.
That also gives you the option to tag your check with relevant words to simplify filtering test results.
Alert policies decide who to notify and when. We'll go into further detail in a separate video. The default policy will send you an email if your site is down for five minutes.
Now test the check to make sure everything’s working. Then click Create Check. There you go. Congratulations! You’ve just set up amazing monitoring for your websites’ availability.
Your check is up and running. Click the Monitoring tab in the top field and watch it in its entire splendor. Whenever you want to make a change, simply click the droplist on your right and choose Edit.
Try it free for 30 days
Start monitoring your website's availability
START 30-DAY FREE TRIALGet started now and you can cancel any time.
